Tuesday, March 28, 2017

ASD Haul Out Part 1

We had ASD hauled out in Ilwaco for a week.  The purpose is to inspect the running gear, change zincs if needed.  The hull is getting a good cleaning and wax/polishing.  Kay put her white suit on and painted the bottom.  Later this week we get a new davit and dinghy.  We are excited.  It has been a little frustrating as the weather has sucked!  Rain and wind.  Racing outside between rain squalls.

Getting ready to lift!

Bow Pulpit Damage from Boat that hit us....


Hope the straps don't break!!


On the hard!

Props and stainless steel rudders

This zinc is getting replaced


Sunset at the "yard!"


Wax on....Wax off!!

Nice shine

BEFORE!  Nasty

Bottom painter

AFTER!!  See the reflection?

See the truck reflection?


Shine Shine!!!

AFTER!  Shine and new paint on the bottom....

Tuesday, March 14, 2017

Another ASD Upgrade

The Admiral wanted to do some interior upgrades, so she decided to replace the carpet, bathroom floor tile and backsplash behind the sink. 

She used Shaw marine carpet, with foam padding in the staterooms and salon.  In the sundeck and flybridge she had the carpet binding sewn on with snaps.

Turned out pretty good.  She did a great job!

Removing the old


While all that work is going on, I was reading how to operate the water maker.

What a mess. This old carpet is at least 25 years old.

Engine room access hatches.

Padding


What is going on here???

Installing carpet

Aft Cabin Stairs

Aft Stateroom


lot of work to be done on the stairs


Before
Finished carpet


Bathroom Old tile removed

Sundeck old carpet
 
Bare bridge floor

Staying out of the way....

Sundeck
 
Finished tile forward bathroom
 
 
Preparing for back splash

Finished back splash

Finished aft bathroom tile


Sundeck carpet

Finished

Thursday, March 9, 2017

Made Water Today!!!!

I made water today!!!! Ran the system in freshwater, so the pressure on the system was only at 350psi. Saltwater is 800psi! It is a little noisy, but this is due to the high pressure lines tied to the bulkhead. I think I will install some pipe insulation to try and knock the noise down a bit. My tank was at 1/3rd and I filled it to 3/4.

The one thing I was surprised by was the amount of "brine" the system bleeds off. It was more than the water my genny kicks out when running. So today I will be pickling it and shutting the system down until we start our trip in about 8 weeks.....

I found the install pretty much straight forward, The electrical connections were a little complex but if you are in doubt, hire an electrician. Next year I will be replacing some of the brass with the correct fittings, be it Teflon or bronze.

Now on to installing new carpet, bathroom tile and galley back splash! Then to Ilwaco for a week to dress up the hull, and have a davit and dinghy installed......

Thanks for following us.

Thursday, March 2, 2017

Water Maker Install Complete (Almost)

All I need are my high pressure lines and do a test run.

I found two spare breakers on my panel, one AC and the other DC, but wrong size, both 10amp.  Need 20amp and 15amp so off to Portland to West Marine. What's nice about my boat is the circuit breaker panel is just a pig tail.  Each wire has a number on it, like D9.  Then you go the main buss and find that number wire on this plastic panel and there is your connection then run the wires to the control panel for the water maker. It was quite easy and applaud the boat manufacture for doing this.  I do wish my circuit breaker panel was like Pairadice.  You open the front door, then the circuit panel is also on hinges, making access easy.  On mine you remove the 8 screws and pull the entire panel out. 

The rest of the plumbing was installed to the back of my control panel.  At a later date I may clean up the back of the panel using 90 degree fittings, but at this point I can still get around the pre-filtered.  Amazing how fast you start to run out of tubing and fittings.

Then I red necked engineered a Y valve so I could use salt water or fresh water at the two deck wash down hoses.  I considered mounting it in front of the water filters on the deck but chose the bulkhead for easier hose installation.  This will be nice to do a fresh water rinse or supply fresh water for my cruising buddies. I also installed a new 70psi wash down pump.  The old one was only 45psi and wasn't enough to blast the sticky mud off the anchor and rode.

So my high pressure hoses are shipped today, once I install them, I can do an initial startup, check for leaks, then pickle the system until we leave around 1st of May.

Manifold I built to tie into the main water line.  When I am making water the top fitting is used to fill my water tanks.  When I need to back flush the system the second fitting is used.

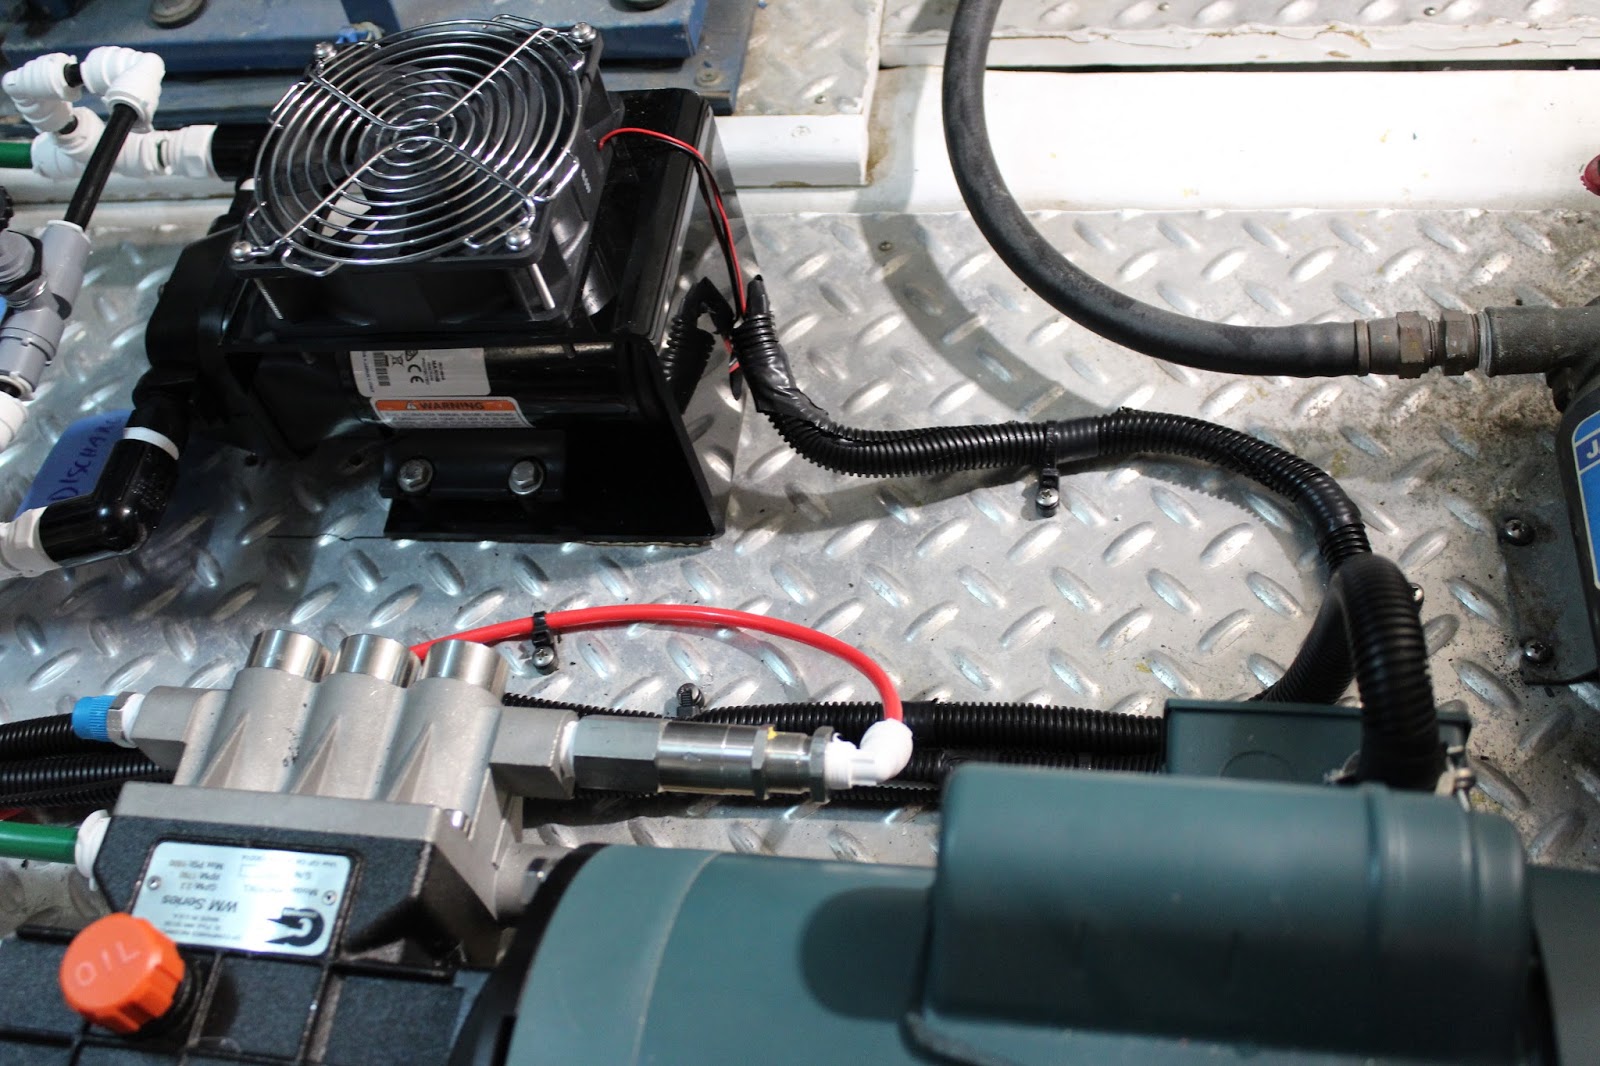
All the hoses and electrical installed on the water maker control panel.

Showing the high pressure pump (green) and low pressure pump.

 
This is my red neck designed Y valve using a small electrical panel to mount it.

All installed

Hiding behind the gage is where I mounted the Y valve

Y valve installed with a new pump.