Thursday, March 9, 2017

Made Water Today!!!!

I made water today!!!! Ran the system in freshwater, so the pressure on the system was only at 350psi. Saltwater is 800psi! It is a little noisy, but this is due to the high pressure lines tied to the bulkhead. I think I will install some pipe insulation to try and knock the noise down a bit. My tank was at 1/3rd and I filled it to 3/4.

The one thing I was surprised by was the amount of "brine" the system bleeds off. It was more than the water my genny kicks out when running. So today I will be pickling it and shutting the system down until we start our trip in about 8 weeks.....

I found the install pretty much straight forward, The electrical connections were a little complex but if you are in doubt, hire an electrician. Next year I will be replacing some of the brass with the correct fittings, be it Teflon or bronze.

Now on to installing new carpet, bathroom tile and galley back splash! Then to Ilwaco for a week to dress up the hull, and have a davit and dinghy installed......

Thanks for following us.

Thursday, March 2, 2017

Water Maker Install Complete (Almost)

All I need are my high pressure lines and do a test run.

I found two spare breakers on my panel, one AC and the other DC, but wrong size, both 10amp.  Need 20amp and 15amp so off to Portland to West Marine. What's nice about my boat is the circuit breaker panel is just a pig tail.  Each wire has a number on it, like D9.  Then you go the main buss and find that number wire on this plastic panel and there is your connection then run the wires to the control panel for the water maker. It was quite easy and applaud the boat manufacture for doing this.  I do wish my circuit breaker panel was like Pairadice.  You open the front door, then the circuit panel is also on hinges, making access easy.  On mine you remove the 8 screws and pull the entire panel out. 

The rest of the plumbing was installed to the back of my control panel.  At a later date I may clean up the back of the panel using 90 degree fittings, but at this point I can still get around the pre-filtered.  Amazing how fast you start to run out of tubing and fittings.

Then I red necked engineered a Y valve so I could use salt water or fresh water at the two deck wash down hoses.  I considered mounting it in front of the water filters on the deck but chose the bulkhead for easier hose installation.  This will be nice to do a fresh water rinse or supply fresh water for my cruising buddies. I also installed a new 70psi wash down pump.  The old one was only 45psi and wasn't enough to blast the sticky mud off the anchor and rode.

So my high pressure hoses are shipped today, once I install them, I can do an initial startup, check for leaks, then pickle the system until we leave around 1st of May.

Manifold I built to tie into the main water line.  When I am making water the top fitting is used to fill my water tanks.  When I need to back flush the system the second fitting is used.

All the hoses and electrical installed on the water maker control panel.

Showing the high pressure pump (green) and low pressure pump.

 
This is my red neck designed Y valve using a small electrical panel to mount it.

All installed

Hiding behind the gage is where I mounted the Y valve

Y valve installed with a new pump.

Thursday, February 23, 2017

Low Pressure tubing installed

The Low pressure plumbing is done with the exception of the brine dump.  Plan on running that up to a sink drain.

In the pics none of the tubing is tied down yet.

I hung the membranes on the ceiling in the ER.  Just have to watch your head when entering or existing the ER.

Waiting on my high pressure hoses to get here.  We also have a scheduled haul out at the end of March for annual maintenance and new davit system install.


Tuesday, February 21, 2017

Reverse Osmosis (RO) Membranes installed

So I was a little concerned with the placement of the RO membranes. It says in big letters, operating temps from 32f to 120f.  My engine room get hot.  So looked all over the boat to mount these tubes. I found a few places but it would mean running high pressure lines 20 feet or more and drilling holes in the bulkhead.  Something I wasn't too thrilled about.  A friend suggested I take a laser temperature tool and actually measure the heat before I place them in the back of the boat.

This morning I ran the engines at 1000rpms for 1.5 hours. Engine room was heated up nicely. I took a laser temp tool with me. The front of the ER was cooler (70f) that the rear (92).

When I shut everything down and let it sit for about 45 minutes, I took some more readings. The front had warmed up to 82f and the rear around 100f. I am still a little concerned about the temps during the summer, but I will keep an eye on it. I just have to learn to duck when entering the ER. Time to read ( they sent me a thumb drive with all the instructions. I took it down and had it printed) and then off to the plumbing

The membranes tubes mounted in engine room (blue tubes)

My "printed" installation manual.

Monday, February 20, 2017

Water Maker Install Begins

I am lucky in that I have some room in my engine room.  When I relocated the battery chargers to the port side it left a nice wall to mount the control panel and twin filters.  I mounted the other filter on the A/C shelve.  The big high pressure pump and low pressure pump fit nicely in front of the STBD engine next to the fwd A/C unit.  I still need to find a home for the membranes.

So now the plumbing and electrical.

Control panel, twin filters and pre-filter on the right just above the blue A/C

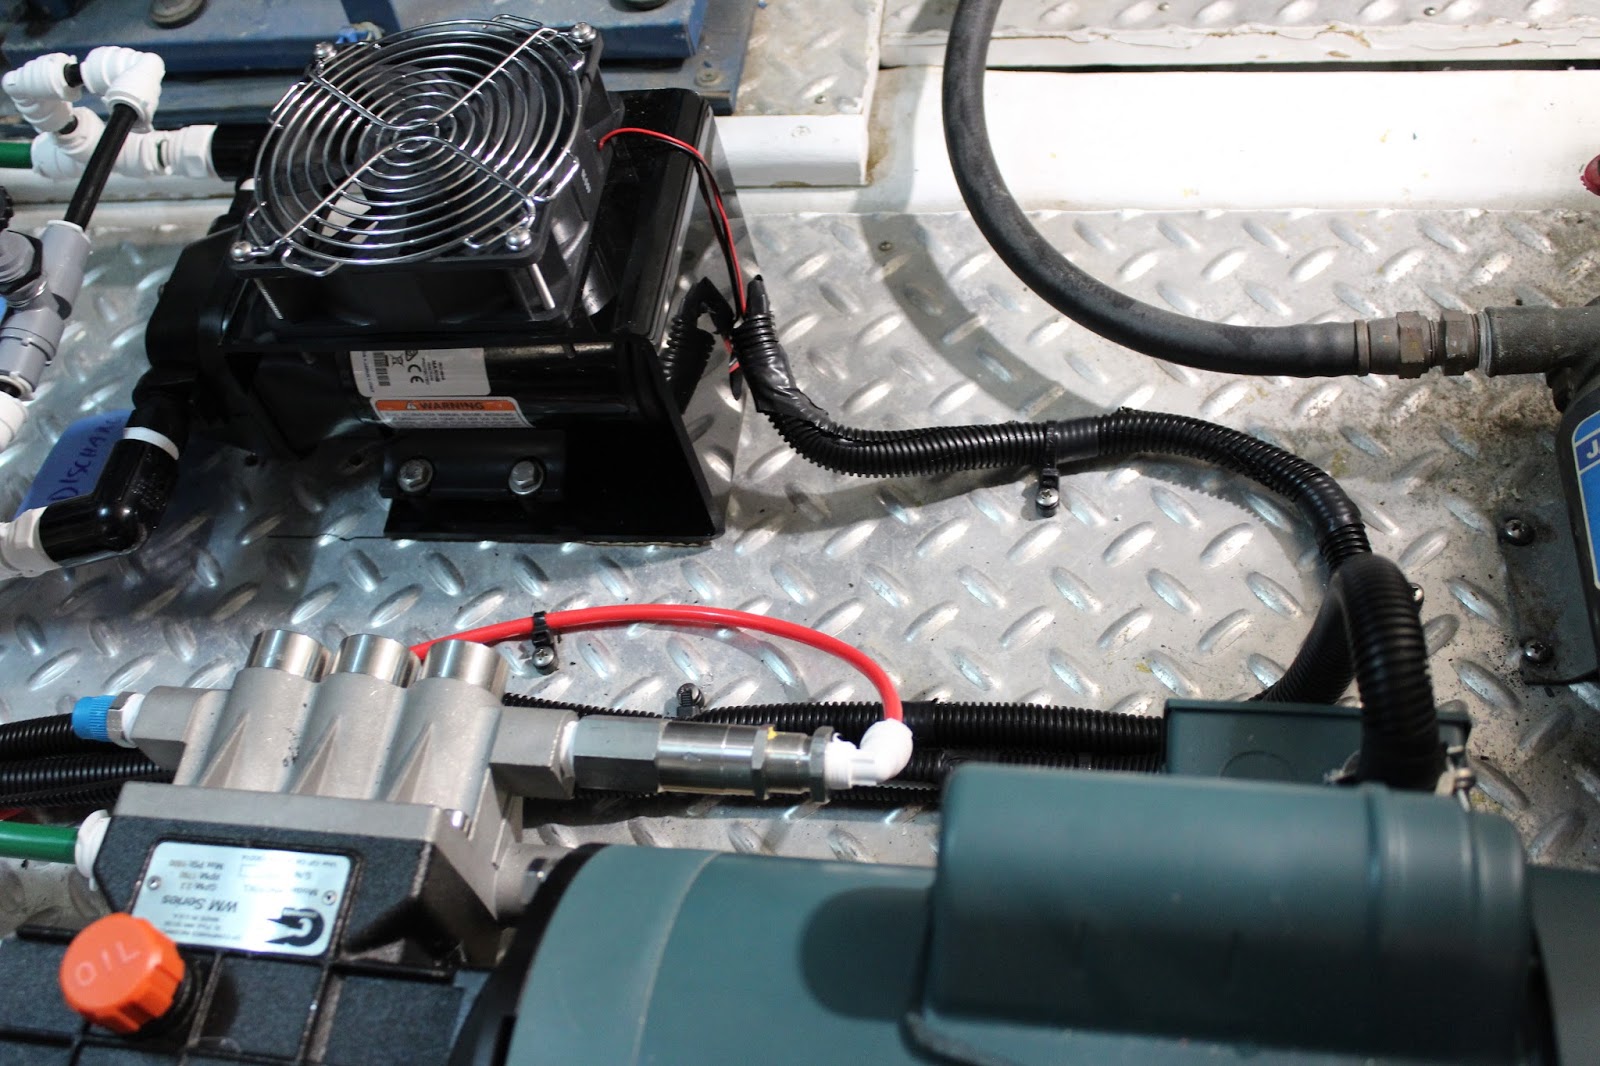
High Pressure pump (green) with low pressure pump (black) with cooling fan.

Saturday, February 18, 2017

Battery Chargers Relocated

The battery chargers are now relocated. Man that was a tight spot. Those that do their own work understand you spend more time running down extra parts than you do in the actual install. The system seems to be working correctly and now on to the water maker.

Primary and secondary charger


Making a wiring harness

Done.......

Wednesday, February 15, 2017

ASD 2017 Prepreations-Water maker

Well the water maker from RO Water arrived today. I will post the process here.

I went to the engine room to start scouting a place to put it. I will be installing it on the STBD side, but before I can do that, I have to relocate the battery chargers to the Port side. There is already a board on that side to mount them. I purchased another Xantrex 40 amp and a remote panel to tie the 2 chargers together. Yes the wiring will be different than you see in the picture. What you see is an emergency fix last summer. 

The membranes will be mounted on the engine room ceiling. This cuts down the length of high pressure lines. The water maker's control panel and filters will be mounted where the battery chargers are currently located. I will tie into the thru hull in the bottom picture. I will also make a manifold and tie that into the salt water wash down.  Once that is installed, I can feed salt or fresh water to the wash down spigots.


The Water Maker has arrived!

First thing is to relocate the battery chargers. (black box and grey box lower left with yellow plugs)

The thru-hull.  Thing with white tag.

The white board in the back is where the chargers are going to be relocated.